Tuesday, December 10, 2013

Anthro Inspired Pom Pom Wreath

I got together with my friends last night to recreate the Anthropologie wool wreath that was in the stores last year.  As much as I love Anthropologie, I really love all the Pinterest knock off versions a ton.  Here is how we made ours.


1.  Start of with a hay wreath form ($5).  I chose the largest size because I have a big door.  With this size form, you will need 4 rolls of yarn (about $18).  The larger and fluffier the yarn, the better....in my opinion.  Then you will need some push pins or U shaped floral pins will work well, too.  Now, let's stroll down memory lane to when we were in Kindergarten.
2.  You will want to cut a strip of yarn to about 8" or 9".  From there, you start wrapping the yarn around your 4 fingers.  We wrapped each one 40 times around our fingers.  The more wraps, the fluffier the pom pom.  
3.  Then you carefully slide it off of your fingers and it will look like this.  Place the wrapped yarn on the strip you cut first.  Then tie it in a knot tightly in the middle.
4.  Once you have done that, take your scissors and cut all the loops.  
5.  Voila!  You will have a pom pom.  We trimmed the uneven strands to make it more like a ball.  The next step is to pin them on your wreath form.  Probably the simplest wreath I have ever made.  
You can embellish it anyway you'd like.  I decided to make a big fabric bow for mine.  Thank you Anthropologie for inspiring all of us!!!


Happy crafting!
tia and andrea

Thursday, October 17, 2013

Halloween Glam Wreath

 
 Two Junk Chix Halloween Glam Wreath
 
Tia and I made these Halloween wreaths using a just a few supplies.
Here is how we made them:
  1. Tie any wreath form with varying lengths of black tulle. 2. Crinkle vintage book pages and coffee filters and pin them randomly on the wreath form or attach using hot glue.  3. We used a 6" embroidery hoop with a black lace doily and attached it to the side. 4. Decorate the hoop any way you'd like.  Tia painted orange chevron to a fabric banner and hot glued black glitter letters to hers.  I cut a banner using some of the book pages and some black rope.  I stamped the word Boo on the banner flags.    I added a little owl and made a "bow" from some coffee filters and book pages.


Tia and some of her friends and their wreaths


Tia's wreath
 

I made mine with my friend Valerie.  Sorry I didn't get a picture of us together .  


Andrea's Wreath
 

We hope you make one too!
 
Happy Crafting and Happy Halloween!!
 
love
Andrea & Tia


Friday, October 4, 2013

Ghost Glass Cloche

It still feels like summer here in Virginia but inside the Dowler house, it's fall.  I love Halloween decorating!  I have this huge glass cloche on my dining room table and decided to go with a ghost theme this year.  
Very simple.  Just filled the cloche with pillow stuffing and then cut out ghost eyes and mouth from a black duct tape sheet.  Simple and so fun!!
Happy Haunting!!!
Tia & Andrea


Sunday, June 23, 2013

Ships Wheel Wreath

SS Dowler!!!  I am loving this new wreath I just made for my front door.  I wanted something that represented summer but didn't want it to look like the usual wreaths you see everywhere so I came up with the idea to make one that looked like a ships wheel.  It was so easy to make!
⚓ I purchased a hay wreath at my local craft store but you could use a styrofoam wreath form, too.
⚓ I also purchased wooden finials in the wood craft section.  I got 8 for the outside and 8 for the inside "spokes"

⚓ I gave all the wooden finials a quick spray of my favorite Heirloom white paint

⚓ While the finials were drying, I wrapped the wreath form with some chevron burlap ribbon.  You could also used just plain burlap or fabric to match your decor.  I just secured it with a stick pin and dab of hot glue.
⚓ Using the hot glue gun, I glued the finials around the wreath form in an even fashion.  
⚓ I then used my circle cutter and cut a big circle for the center and backed it on cardboard for stability. Then hot glued it to the center wooden spokes.  
⚓ My friend Amanda with Funkyshique had made me this mini burlap banner with my last name on it so I thought it would be cute to add it to the wreath.  
⚓ Another cute option would be to put a painted wooden anchor in the center of the wreath. 
⚓ Let us know what other options you can think of, too!!

Happy crafting!!
tia & andrea

Monday, June 17, 2013

Front porch flea market style


My mother in law and I went to an awesome outdoor flea market this past Saturday. The flea market is only once a month for the weekend.  It is Ohio in Gallopolis at the Gallia Co fair grounds.     


I picked up some cool finds that I decorated my front porch with.    I like the mix of "junk" that I found at the market.  On the table is a Pepsi crate filled with cool finds.  I added a metal tin tool box that I repurposed into a flower box.  Tia and I bought the cabinet doors back in Jan when I visited her.   I painted it with chalk board paint and thought I looked good behind the crate.   Added a couple mason stars in the Pepsi crate for an Americana fill.  The crate beside the table is an old apple crate.    I love the mix of woods and metal old and new.    Makes me happy!!!!

 
Happy Junkin!
 
andrea & tia

Friday, May 31, 2013

Summer banner wreath

Hello Summer!!!!!  
Well Tia and I have been super busy this spring and I thought it was about time to give some love to our blog.    So here we are last day of May and this was the first Crafty thing that I have done in months.  

I made this wreath using a paper pad that I got at ACMoore that was filled with Summer Printed papers.   I LOVE paper banners and came up with fun Paper banner wreath.   
 
These are the supplies that I used.
 multiple pattern papers that I cut into 2 x 12 paper strips
a wire wreath form with multiple rings
Glue sticks and gun
Stapler
Canvas banner
Clear sealing spray
Scissors
pencil
paint
brush
string
 

I folded all the papers in half first to make the process fast.  Once all the papers were folded,  I attached the paper to the outer ring first on the wire form until they were going around the length of the form.  I stapled the paper close to the form to hold it in place.  I used the hot glue to glue the papers together once I had them in place.    Then continued until I had all the rows completed.   I cut all the "tales" in the paper once I had them all attached.   I had a few strips left and rolled the paper to make the ring in the center.   I thought it looked more finished. 

The Banner in the center, I used pre cut canvas banners that I got at Michaels.   I hand painted the letters to spell "summer".   I used some string glued the canvas to the string and covered the top edge with a strip of the patterned papers that was left.     
 
I learned this the hard way.   I hung my wreath up the night I finished it and the humidity in the air rolled the papers and the upper layer rolled over.   I was so bummed to see that the next morning.    Whipped out my glue gun and problem solved!   I glued the backs of the paper to the under layers of papers which helped make it more sturdy.    I added some clear acrylic spray to  add even more support.   It has been on the door for a couple of days now and is fine.  
 
Here's to happy and fun filled summer!!!
 
Love Andrea & Tia

Sunday, February 10, 2013

Paper Valentine Wreath

 
Will you be our Valentine?
 
 
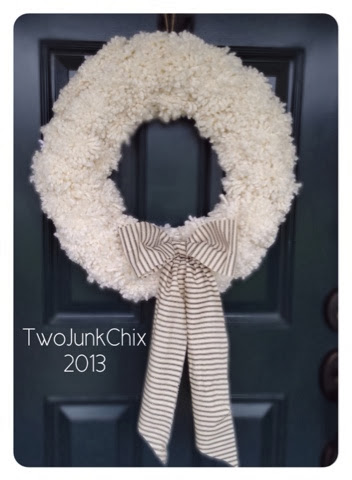
Tia and I made these all-paper wreaths for Valentine's Day when I visited Virginia last month.    We love them and wanted to share how we made them.

 You need lots of Doilies (we used 10 in and 8in)
Large Round Cake Base  (16 in)
Coffee Filters natural and dyed pink and red Coffee filters
scissors
Hot glue gun and glue sticks
stapler
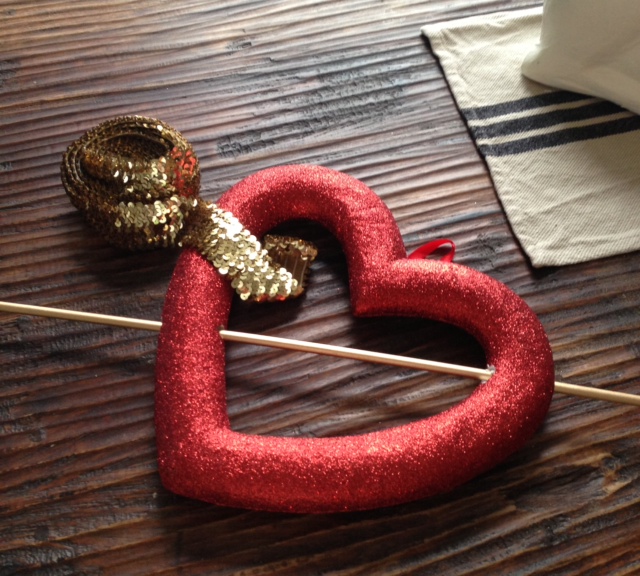
and a heart or something to decorate the middle of your wreath
 
 
 We cut all the doilies in half.
    Tia & I both did a different fold on the doilies when creating the wreath.  The main idea here is to have it rolled in a tube shape and closed on the cut side of the doily so that you can glue that end down to the cake form.  When we started gluing them down it really didn't matter how it was rolled.  We used the 10 inch doilies on the back layer of the wreath.
  TIP:  make all your rolled doilies first before you glue  makes the process go so much faster.       
  Next layers is the natural Coffee filters.   We folded the filters in half and then in half again.   This makes somewhat of a triangle shape.   Attach them with glue at the point of the triangle to form the next layer.
Next is to repeat the first step but now use the 8 inch doilies and attach the rolled doilies to make the 3rd layer.
 
We used red and pink dyed coffee filters that Tia had from another project to make the 4th layer.
In the Center of the Wreath, we stacked and layered opened crinkled filters and some of the left over doilies to make the center of the wreath.  
We found the vintage metal hearts at a junk store in Va and thought that they made a perfect finish to our wreaths.

Much Love from Twojunkchix!!!
xoxo
Andrea & Tia

Sunday, February 3, 2013

Valentine Pennants


I made these Valentine Pennants last weekend.   I love the mix of papers and items that make up the arrangement. 
 
You need:
pattern paper
dowel rods
small syrofoam balls
dollies
German glass glitter or plain glitter
Red glitter paint
pencil
ruler
hot glue
Mod podge
other embellishments to add to your pennants
container
 
 I used papers that I had purchase a while back at Hobby Lobby and layered them on cardstock for stability.   I cut the shape of the pennants out with scissors.  I just eyeballed it to get the shape.   You can be more precise if you want and use a ruler and measure.  I did use a ruler just for straight edge.    I used hot glue to secure the pennant to the dowel rods.  To the top of the dowels I added a styrofoam ball covered in glitter to give it a more finished look.   I added a few embellishments to the pennants to decorate them up a bit.
The top pennant I free handed a heart with pencil and filled it in with mod podge and glitter.   The bottom I free handed the word love in pencil and went over it with red glitter glue.  


I got this little chalkboard heart at Michaels.  It was already on  the dowel rod.    I wrote Jet'aime on it with chalk. 

This heart was from a project a couple of years and thought it looked good with the others.  I die cut the heart out and stamped love on it. 

This was a paper lollie layered with several different dollies.  I added a chipboard heart in the center. 

In the vase I added some floral foam just hold it all together and so that it wouldn't shift all over.    I added some vintage paper shreds to cover the floral foam.


xoxo

Andrea & Tia
 

Wednesday, January 30, 2013

Project LIfe

 
Thompson Family Album 2013
 
I love memory keeping and this year I plan on better job at it. 
This year I am doing Project Life.  This will be my 2nd year scrapbooking this way.  If you dont know what it is,  Project Life is a weekly approach to scrapbooking and documenting everyday life through photos and journaling.  In one word "simplify" the process . You can read about Project Life HERE.
 
 
 I have been scrapbooking 15+ years and I have fallen in love with Project Life.  I love caputuring the everyday moments along with big moments in our family lives.   I still like to add a few 12x12 pages in my album along with the photo pages.   
In the future, I plan on sharing my weekly pages with you.  Right now I'm playing a little catch up and will share all of my weekly pages soon.
   
This post I thought that I would share mainly how I store my cards and supplies for Project Life.  I like to be very organized when I'm working.   I need to be... my room is multi-project necessary.   I craft here, scrapbook here, make jewelry here, and BLOG here.  I love my room and I have made the best of the small space that I have.
The above picture is my desk space.  My dad gave me a pop-up 6 foot table that I work on.   The Cube Storage that is along the back of the desk I picked up at Michael's.  The 2 on the ends of the desk are what I store my Project Life supplies in.  
 What I love most about the cubes they came with dividers in the drawers.  Easy built in organization and the cubbies fit the cards perfectly.
 I store embellishments and stickers in this cube's drawers.  This cube has long drawers perfect for letter stickers.
When I'm working on my desk I can have the drawers pulled out on the ends and work in between the drawers.  I love that everything is organized and I can be more productive while working. 
Project Life page....a work in progress
Thompson 2013 Project Life Title Page
Project Life Seafoam Edition
Amy Tangerine Album
 
 
Happy Memory Keeping
Andrea and Tia

Heart Canvas

When I was at Tia's last month,  I made a canvas too with the left over Fabric and Upholstery Tacks that Tia used on her project as seen here http://twojunkchix.blogspot.com/2012/12/upholstery-tack-canvas-art.html
 
I thought it was a simple take on her project and it was fast to make.   I created it the same as Tia did in her project attaching the fabric to the canvas.  I traced a heart shape on the fabric and pushed the tacks in and viola instant Valentine Art. 


XOXO
Andrea & Tia

Thursday, January 10, 2013

Heart with Arrow Wreath

As Valentine's Day is fast approaching, Andrea and I thought we should get a jumpstart on a Valentine craft.  I was searching for inspiration online and came across a wreath on Google that was pink sequins and I loved it!  So we decided to try our had at these wreaths and decorate them to meet our individual taste.


Supplies:
heart shaped wreath form
dowel rod
feathers
glitter & glue
paper
sequins, tulle, or ribbon


When I was a little girl (see photo below....yep, that's me), I truly thought I was going to grow up to be a Solid Gold Dancer.  I was so fascinated by them!  So I decided to do my wreath in gold sequins.  We found these styrofoam wreath forms at Hobby Lobby.  Using a dowel rod, we poked it through the wreath form in a diagonal as if cupid himself shot right through it.  Then you start wrapping the wreath form in whatever you'd like to cover it with.  My next one will be burlap. Andrea used red tulle for hers.


We've been seeing these glitter tipped feathers all over Pinterest so we decided to add these to the wreath, as well.  Using glittering glue, just paint the tips with the glue and pour your glitter on them.  I used gold and Andrea used red on hers.

Using the standard accordion fold technique, we added lollies to cover up the bottom of the feathers.  Andrea used shredded paper behind her lollie that was left over from our garland project and I used pink paper fringe behind mine.  


We cut out triangles from vintage paper and hot glued them to the tip of the dowel for the arrow's point.  We then used the rest of the feathers (I had to cut mine shorter) as the bottom of the arrow...attaching them with hot glue.


Tia's ode to the groovy Solid Gold Dancers
&
Andrea's classic red Valentine version


Happy crafting and giddy up!!
tia & andrea


Related Posts with Thumbnails