Wednesday, December 22, 2010

I'm dreaming of...

...a white Christmas? Me? No, I'm dreaming of a robins egg blue Christmas. After spending many Christmases in Chicago, I have had my share of white Christmases. As much as I love Chi-town and always will, this cowgirl is certainly glad to be back in the South! Spending our first Christmas in a brand new house has it's challenges. Where do I put this? Where do I put that? So this year, I did put up two trees but kept the smaller pencil tree in the dining room just for me. This is where I can add some of my robins egg blue treasures. I love how the old skates look in this vintage frame with the robins egg blue tinsel banner that says "winter frolic". 
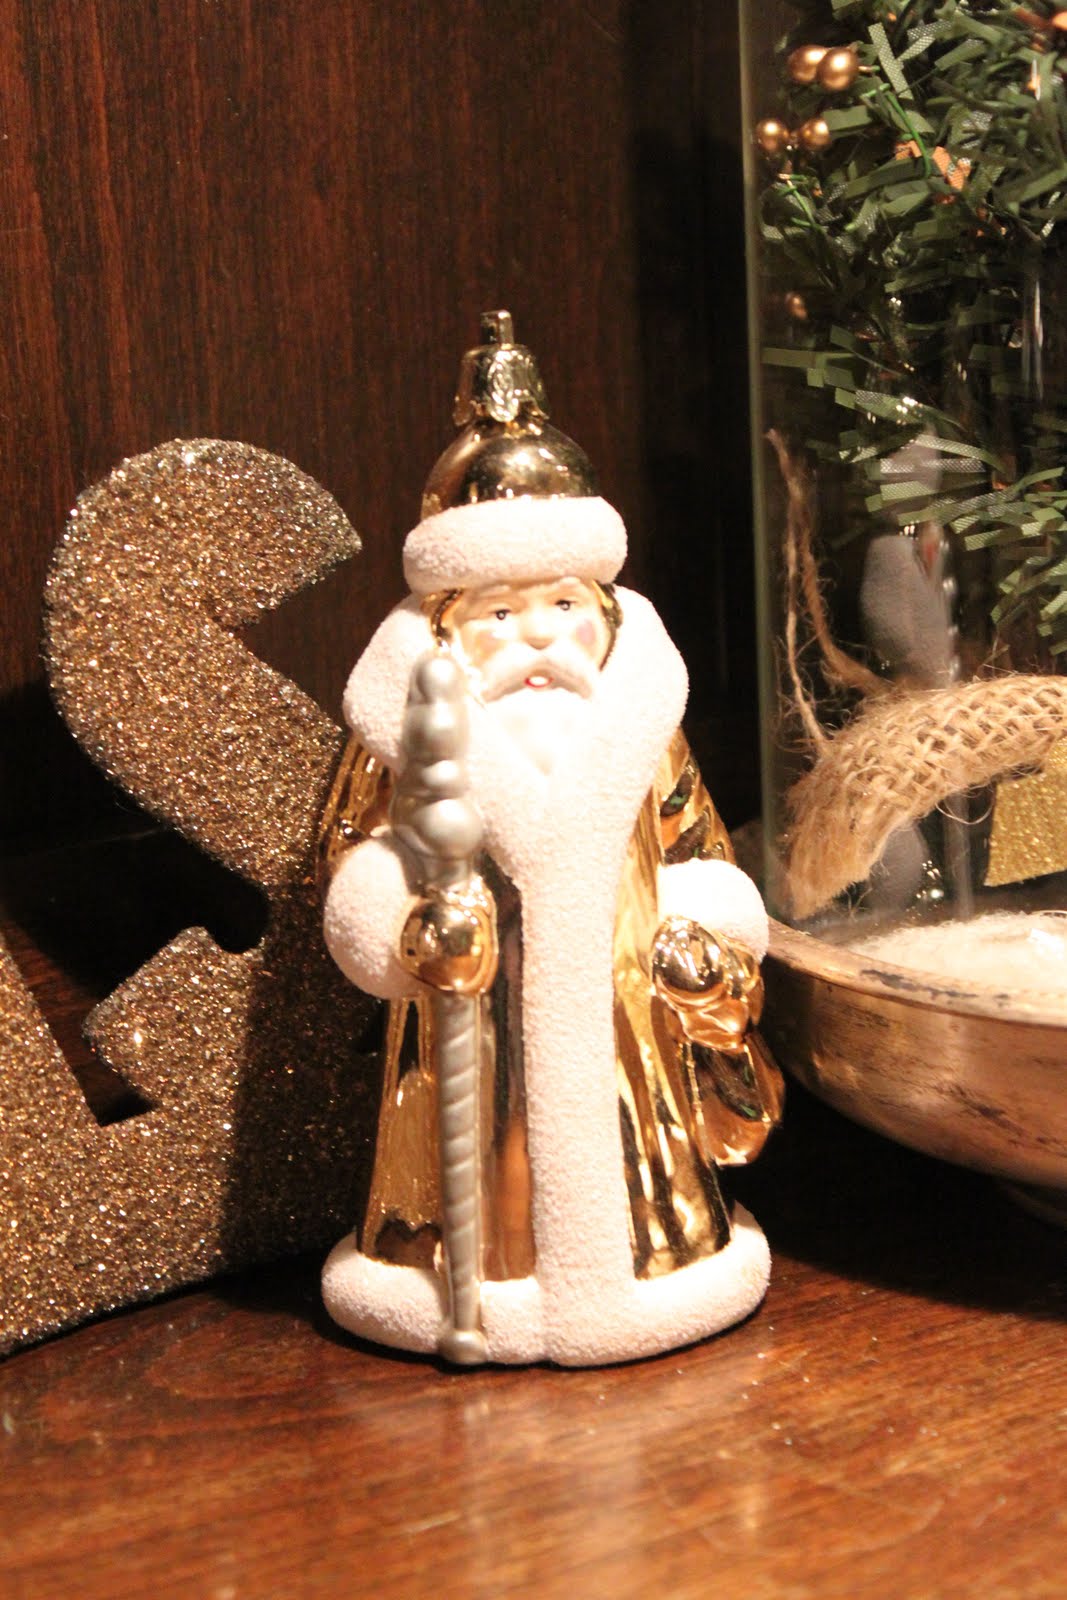
The robins egg blue glittered Santas have found the perfect spot on the dining room table. Unfortunately I didn't get out all of my beloved Wendy Addison stuff this year but that's OK....there is always next year.

I was so excited that the Restoration Hardware table arrived on time for Thanksgiving, but we weren't so lucky with the chairs. Looks like they will be here the end of January. Once the chairs arrive and the vintage ceiling tins are up on the ceiling, it will have all been worth the wait!


Merry Christmas from our house to yours!!

♥ tia

Tuesday, December 7, 2010

Silver and Gold


In my dining room I decorated with a silver and gold color scheme. It started with the Christmas sign that my mother in law (Tia's mom) got me several years ago. It is covered in German glass glitter and it happens to be one of my favorite Christmas decorations.


When I was in Chicago this summer visiting with Tia, she gave me the glass dome and cheese dish. I gave it a quick white wash finish. I am going to leave it up after Christmas and just change the sign to something with the word winter once Christmas is over. I love the little tree in the glass cloche with the snow glitter.

I also love Santas!!! I have a love affair with Old Saint Nick. I picked this one up at Target for only $3.00. Gotta love Target!!! Platinum colored jingle bells are in the dish for a festive look.


Close up of the bird. I got it at Michaels.


Monogramed T ornament


Little trees that I made. I got the Idea for them From Shanty2chic. Will share how to and link this weekennd.
Hope your Holidays Sparkle!!!


Andrea

Santa Gift Tags

I made some fun Santa Gift Tags from a cute stamp set that I got from Stampin Up. I love Santa and this stamp set had the cutest little Santa stamp in it so I had to have it!!!
I have been home not feeling well for the past several days... awful time of the year to be sick. UGH!!!! My Doctor told me to rest and do NOTHING for the past couple of days. I have been resting at home I did sneak in a little craftytime tonight. Creating something is good medicine too!!!! LOL!!!!
I used Cardstock in red, green and white. The Stamp set is from Stampin Up. Polka Dot stamp is from Hero Arts. Copic markers in cool grey , Dark red,Lipstick Red Pale Fruit Pink , And Blush.

I stamped the polka dots on a punched tag for some background texture to the tags.
Used red ink to stamp Santa's hat on red cardstock. This made it easier to cut out the hats. After the hats were cut out, I used the red Copics to add some shading to the hats.
I stamped Santa on White cardstock.
Next colored Santa using Copics. I used the pale fruit for Santa's Face and added Blush for his cheeks and nose. I added some of the Cool grey to the outlines of his beard and mustache.
I cut out Santa once colored in. I trimmed the curls off his mustache because it was easier to cut out.
Once assembled to the tag, I stamped To: From: on Santa's beard. I added some stickles to the trim on his hat. I used a dot sticker for the ball on his hat because it is what I had on hand. I added some sickles to the ball too. I think it would be super cute to use pom poms but I didn't have any.
Thanks for Looking !!!
Andrea


Monday, November 29, 2010

Before & After...

Five years ago, my awesome mom had these metal packages that I designed come to life by having them cut in metal. And for five years, they have been lime green and cranberry to go with my Ballard Design Christmas look. And as much as I love that look, these metal packages have seen better days before going through a bunch of Chicago winters. Now that I'm back in the South (yee haw) with much milder temperatures, I decided to bring them back out and revamp them. Since my favorite combination is robins egg blue and gray, I decided to paint them those colors. Many of my Christmas decorations are robins egg and silver, so I thought this was the perfect compliment.

I just love how they look now! It's still not finished.....gotta get the hubby to drape lights down the urns for that cascading effect. Revamping is the Two Junk Chix way!!
xoxo,
tia


Friday, November 26, 2010

Slowly but surely...

the morning/breakfast room is finally coming together. My sweet friend, Wendy made these gorgeous black and cream panels for me. I love how they compliment the gray walls. Once the plantation shutters go in, the fabic is going to pop even more! I just received these beautiful gray latte bowls from Anthropologie as a gift and thought they were too pretty to put in the cabinet so I decided to display them in the 3 tiered stand.

Thanks Wendy for doing such a fabulous job on these!! I'll post the bedroom curtains you made for me as soon as I can get on the ball. Now I'm off to look for Christmas decorations!!

xoxo,
tia

Sunday, November 14, 2010

Scored Flower Tutorial

These flowers are really easy and only take a couple of minutes to make each one.

First you need to strips of paper cut in the same size. You can cut them in what ever size that you want your flowers to be. For this flower I cut the paper in 12 x 2 inch strips.
Next score the paper strips in equal measurements. I used 1/2 inch and 1/4 inch increments for the flowers. I scored this flower in 1/2 inch increments. I used the Martha Stewart Score board. Makes scoring super easy and it has the measurements right on it. Once your strips are scored, fold them into accordian folds.
Glue both strips together. I used hot glue. I like to use hot glue because it fast drying and it holds well. Glue the other end to form a circle.
Flatten the circle and form it into the flower shape and add some hot glue in the middle. Hold the flower until the glue dries.
Add an embellishment in the middle of the flower to accent the flower and create the center.
For the flowers that I created on the wreath, I used punched circles, burlap circles, and buttons to accent them.


Enjoy!!!
Andrea


Thursday, November 11, 2010

Door for hope

November is Pancreatic Cancer Awareness month along with Juvenile Diabetes Month.
I was asked by a friend of mine from school that is asking everybody to "paint" their door purple during the month of November for awareness. In January of this year she lost her mother, Sherry Shumaker to Pancreatic Cancer. This month she wanted everyone to decorate their front door for awareness and to show support to those affected by this cancer. So I created this wreath for my front door.

I wanted to add some orange and greens for the season. The leaves also made it more seasonal too but still kept the majority of it focusing on the purple.


I used a green Styrofoam wreath as the base. I covered in in burlap fabric that I cut in to strips and wrapped around the wreath. I created all the flowers from scrapbook paper then scored and folded the paper to form the flowers. I added buttons and burlap circles to create the center. I die cut leaves and added some distressing ink on the leaves for some texture. Then I layered the flowers to create the surface of the wreath. I added a berry wreath behind it to add some more texture. I am so pleased with the way that it turned out. I can see myself making one in Christmas colors for next month. :)


Check back this weekend I will post a tutorial on how to make the flowers.
Thanks for looking!!!


Andrea


Friday, November 5, 2010

November is Juvenile Diabetes Awareness Month!

November is national juvenile diabetes awareness month and this month is a very busy month for me. As most of you know, my son, Bryson was diagnosed with juvenile diabetes 4 years ago at the age of 8. Like any other parent, the news of this was devastating....it still is. But as we go through life, we have choices to make. And the choice I made for myself was to be proactive and this is when Crimson Clover was born. I have spent the past 4 years making jewlery and donating a big portion of the proceeds to the JDRF in my sons name and every year we create a special piece where 100% of the proceeds are donated to the JDRF research project. I am so blessed to be able to stay at home with my 5 children and create pieces for all of you to enjoy and know that I'm doing what God has put me on this Earth to do. This is my mission and my passion in life and I won't stop until we find a cure!


I wanted to take the time to share with you some of my favorite diabetes products on Etsy. You can buy the Crimson Clover diabetes necklace HERE.
I just LOVE this awesome cuff bracelet! It is so cool. I think I'm going to have to get one for Bryson. You can check it out HERE.


This diabetes bracelet is simple yet eleagant.....so pretty. Check it out HERE.

This diabetes bracelet is very cool, as well. I love the rustic feel of it with the pearls. You can find it HERE.


This shirt is just fun. Bryson laughed when he saw it. Sometimes you just have to have fun in light of a not so good situation. You can find it HERE.


What a great solution for sleeping!! Bryson's clip that holds his pump is just not comfortable when sleeping. This is fabulous!! I love it!! You can find it HERE.


This is such a cute necklace and it has my favorite black and white damask print! So so cute!! Check it out HERE.


And this necklace is just beautiful! I love how it is very unisex feeling and reminds me of the Lucky Brand jewelry that I love so much. Just gorgeous! You can find it HERE.


Help us find a cure for this devastating disease!
For more information on juvenile diabetes, please visit JDRF and ADA
xoxo,
tia


Thursday, October 14, 2010

Halloween Decorating

Every neighborhood always has that one house that is decked out for Halloween where they have transformed their yard into a graveyard and their garage into a haunted house. I have to say that I absolutely LOVE those houses. And all the kids flock there and it turns into a neighborhood gathering. Well, that just isn't my house....maybe one of these days. I've always wondered where those people store that stuff the other 364 days of the year. I'm more of a vignette kinda gal with simple Halloween touches scattered around. Meet Helga Henson! Isn't she fab?! She is the witchiest of all witches. My mom just had her cut out of metal for me and surprised me last weekend with her. She is almost life size and even holds a real lantern!


The Witching Hour by the front door


Vintage inspired paper mache masks


Even the butlers pantry gets a little spooky!


Happy Haunting!
xoxo,
tia


Related Posts with Thumbnails