Tuesday, December 16, 2014

Joy Marquee sign

So it started with a trip to one of the major hardware stores in November.   I saw a workshop being advertised to make a joy marquee sign.   I asked an associate if you made it that night and he said yes.   I was excited to go and make it.  I even invited 2 of my friends to go.     We were all excited.    Well our excitement turned to disappointment when we learned at the workshop that you didn't get to make the project just watch an associate make it.  We were told that we could spend 100s on supplies and tools and do it ourself.     Well we along with most of the other ladies that were there left the store once we realized that we in fact were not making the sign.   I was hugely disappointed that we didn't make it that night and that I probably wasn't going to make it cause I didn't have the tools or was not going to purchase them either.  

I thought about it and made up my mind that wasn't going to happen.  Not this crafty girl!!!!   I put my thinking cap on and thought how to "do this" without all those tools. 

  I came up with the idea to use a premade chalk board from Hobby Lobby.  It was already framed and the background was there to hold the letters for marquee.   It was $7.99 reg price.    I left mine the original chalkboard on my finished project but you can paint it if you would like.    I used the cardboard and chipboard letters from Hobby Lobby too.  


All supplies that I used to make mine.  The 

Chalkboard 
J and Y cardboard letter 
O chipboard  letter
Marquee lights 
Mod podge 
Glitter extra fine gold/silver mix
Foam Brushes
Red paint 
Hot glue
Drill 
Ink pad
Small wooden block
Ducktape 


I seperated the balls from the lights so I could figure out the placement on the "O".  Once I had them laid out how I wanted them to look and spaced on the "o".  I stamped the end of the bulb with ink to make a mark for drilling the holes.  


My husband drilled the holes for me.   He doesn't want me to play with his "toys".   so I let him do it.    When you drill the holes...don't panic the holes aren't pretty.   It doesn't matter cause the holes will be behind the light bulbs and no one can see them anyways.   It will be our secret.    


Told ya... Not pretty!!!!


One the holes are drilled.     Glitter the letters.  I used the Modge Podge to glue the glitter on the letters.     

*****warning glitter is so sparkly and pretty but it is the herpes of crafty supplies and you will have sparkles EVERYWHERE!!!!***** 


   Place the lights through the holes and hot glue the bulbs in place over the lights.     You will have to ducktape the cord in place on the backside of the letter like this so you can't see it once glued down to the board.    


Next you have to drill a hole in the chalkboard for your lights to go through the board.      You want to line the hole behind the "o" so you don't see it.   The hole should be at the bottom so you can plug it in.   When I assembled it I thought I could hot glue it to the board and it would stay.   It didn't.    I used a small wood block at the top of the "o" and hot glued that to the "o" and the chalkboard.     
Next just glue the J and Y to the board and you are done.   
  
I was going to leave it like this and be done but it just didn't seem finished to me.   I pained the trim with some red acrylic paint.  


Close up of the Marquee and lights.  

I love how it turned out.    It only cost me less than $20 to make it.    Take that big Hardware store!!!!!!   I did it myself!!!!

May you find JOY this holiday season.   

Love, Andrea & Tia

Wednesday, December 3, 2014

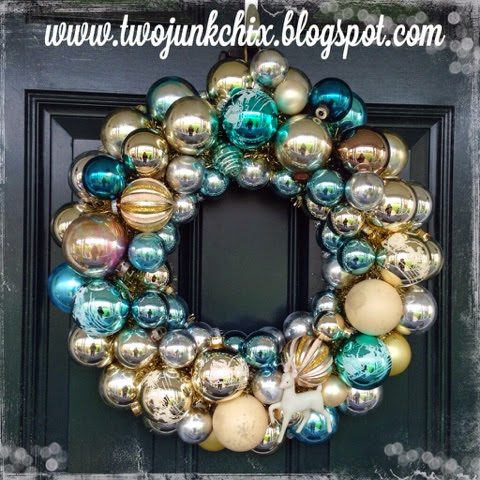
New Vintage Ornament Wreath

I have to say that I have been wanting to make one of these wreaths forever!!  I used to have an awesome vintage ornament collection from my mom but unfortunately most of them got broken when a shelf in my basement fell on them years ago.  I was only able to salvage a few of them.  So with that being said, I decided to take new ornaments and make them look old.  Before I get started, I have read almost every tutorial on Pinterest on how to antique new ornaments and I have to say that none of the techniques worked for me to achieve the look I was going for.  I wanted my ornaments to be faded and spotty like they have hung on many trees over the last 80 years.  Doing the nail polish remover and paper towel just didn't cut it for me.  So read below and I'll share with you how we did ours.
First, you want to start with glass ornaments.  You cannot use those shatterproof ornaments.....they need to be glass.  And you need a TON per 14" wreath form.  I wish I could tell you how many you need but it all depends on what kind of look you are going for.  I say buy more than you think you will need and go from there. You will need:
glass ornaments in various sizes and shapes
 styrofoam wreath form (we used 14" from Hobby Lobby) 
 15 ft strand of tinsel (we used gold and it was $4 at Walmart)
 hot glue gun ( a ton of hot glue)
acetone nail polish remover
nail brush
sandpaper
steel wool #0000
I hit the jackpot and got a ton of glass ornaments at Big Lots for very little money.  I cleaned our store out!!!
I wanted more of the mottled and faded look for my ornaments.  The blue ornaments were easier to do. All we had to do on those was soak them in acetone for about 30 seconds and then start wiping away the blue paint with a paper towel and the nail brush.  I actually used a circular motion with the nail brush because I wanted areas of the ornaments to have no paint at all.  Depending on the look you want, you can do more or less on each ornament.  Remember, these are supposed to look like they have seen 80 years worth of Christmases.  The silver and gold ornaments didn't work with the standard nail polish remover and paper towel method.  So we used a combination of sand paper and the best was the #0000 steel wool.  We just lightly went over the ornaments with the steel wool.  Once you remove a lot of the "shine" with the steel wool, you really don't need to do the next step with the nail polish remover.  Like I said, it's just a personal preference on what look you are trying to achieve.
The photo below is an example of the mottled sort of spotted look that I was going for.  All of my vintage ornaments that were salvaged all look like this so I wanted the new ones to look the same.  
This is kind of a time consuming part so I recommend getting a friend or two to keep you company and help while you do this part.
Now for the FUN!!!!!!  All the ornaments are done so lets get out the tinsel!!!!!
You want to secure your tinsel on your wreath form with a dab of hot glue and wrap it around the entire wreath form and then secure the other end with hot glue.  We used a 15 foot strand of gold tinsel that I got at Walmart and it fit perfectly on the 14" wreath form.  The wreath form was purchased at Hobby Lobby.
This is where you can get as creative as you want.  Remember there is no right or wrong way to do this.
We started by hot gluing the largest ornaments to the outside perimeter and then the smallest ones on the inside perimeter. (See photo below)
From there, you just start filling in the empty space.  It's ok if some of the tinsel is peeking through.  The best advice I can give when making a wreath like this is to not over think it.  That's the mistake that most people make with these types of wreaths.  Just start randomly gluing the ornaments and then fill in later with the smaller ornaments and trust me....you can't go wrong and mess this up.
Here are our finished three!!  Gorgeous!!!


Happy Crafting!!!
xoxo
tia & andrea

Wednesday, June 18, 2014

Easy Summer Monogram hat

I just made this hat in 5 minutes after work  today and it only cost $6 to make!!!!!!  

My family went to the beach last week and I saw some cute ball caps and I wanted one.    I was going to order one from etsy but last night while I was at hobby lobby I changed mind.   I found everything that I needed to make a cute hat myself.    

The hat was 4.99 and I used a 40% off coupon on it.   The chevron patch was 1.99.  The "a" was 1.39.     

The only tool that you need is an iron.  The little patches are iron on.  Easy peezy!!!!


                   Happy Summer!!
                 Andrea  &  Tia 


Wednesday, January 15, 2014

Pink & Gold Valentine Mantel

Here's a sneak peek of this years pink and gold themed Valentine mantel.  I love this color combination.  Because there are too many projects to talk about on the mantle, I'll create several posts of tutorials for you.  Thanks to my dear friend Danette at www.ensepiaphotography.com for the fabulous photos!

Xoxo.....Tia and Andrea



Related Posts with Thumbnails